MORE FROM@SONNY


...

...
7

...

...
Prerequisite: Python and Command Line fundamentals
Versions: Python 3.10, imageio 2.16.2
Read Time: 30 minutes
Do you pronounce it “GIF” or a “JIF”? Either way, Graphics Interchange Format (GIF) is great for creating animated images. The format has been around since 1987 and helped define the early internet. It’s used to display memes, graphics, logos, and it's everywhere — on websites, text messages, and social media.
GIFs are “animated images” because they aren’t exactly videos. They are more like flipbooks; they don’t have sound and flip through multiple pictures sequentially. 🎞️

In this project tutorial, I will show you how to combine multiple images and create a GIF using just 6 lines of Python code! We'll use a list, a for loop, and a library called imageio.
Here’s a preview of the project:

Alright, let's get started! ^ ^
Imageio is a Python library that provides an easy interface to read and write a wide range of image data. It runs on Python 3.5 and above.
Suppose you have Python and pip the package installer on your computer. In that case, you can install imageio using this command in the Terminal (Mac) or Command Prompt (Windows):
pip3 install imageio
Press enter, and this message should appear:
Successfully installed imageio-2.19.3
Note: If you don't have Python and pip installed, make sure to go through this project.
You can quickly check if the imageio package was successfully installed by opening Python IDLE and running the command import imageio. If no errors appear, then you are good to go!
Let’s open up a code editor like VS Code and create a new file called create_gif.py.
To use the imageio library, you need to import it in your code:
import imageio.v3 as iio
The "v3" in the import statement means you're using version 3 of the imageio library. The as part allows you to give the library a shorter name to work with (a nickname/alias), making it more convenient. So we've renamed imageio.v3 to iio moving forward.
Now, run the code to make sure it works. Hopefully there's no error!
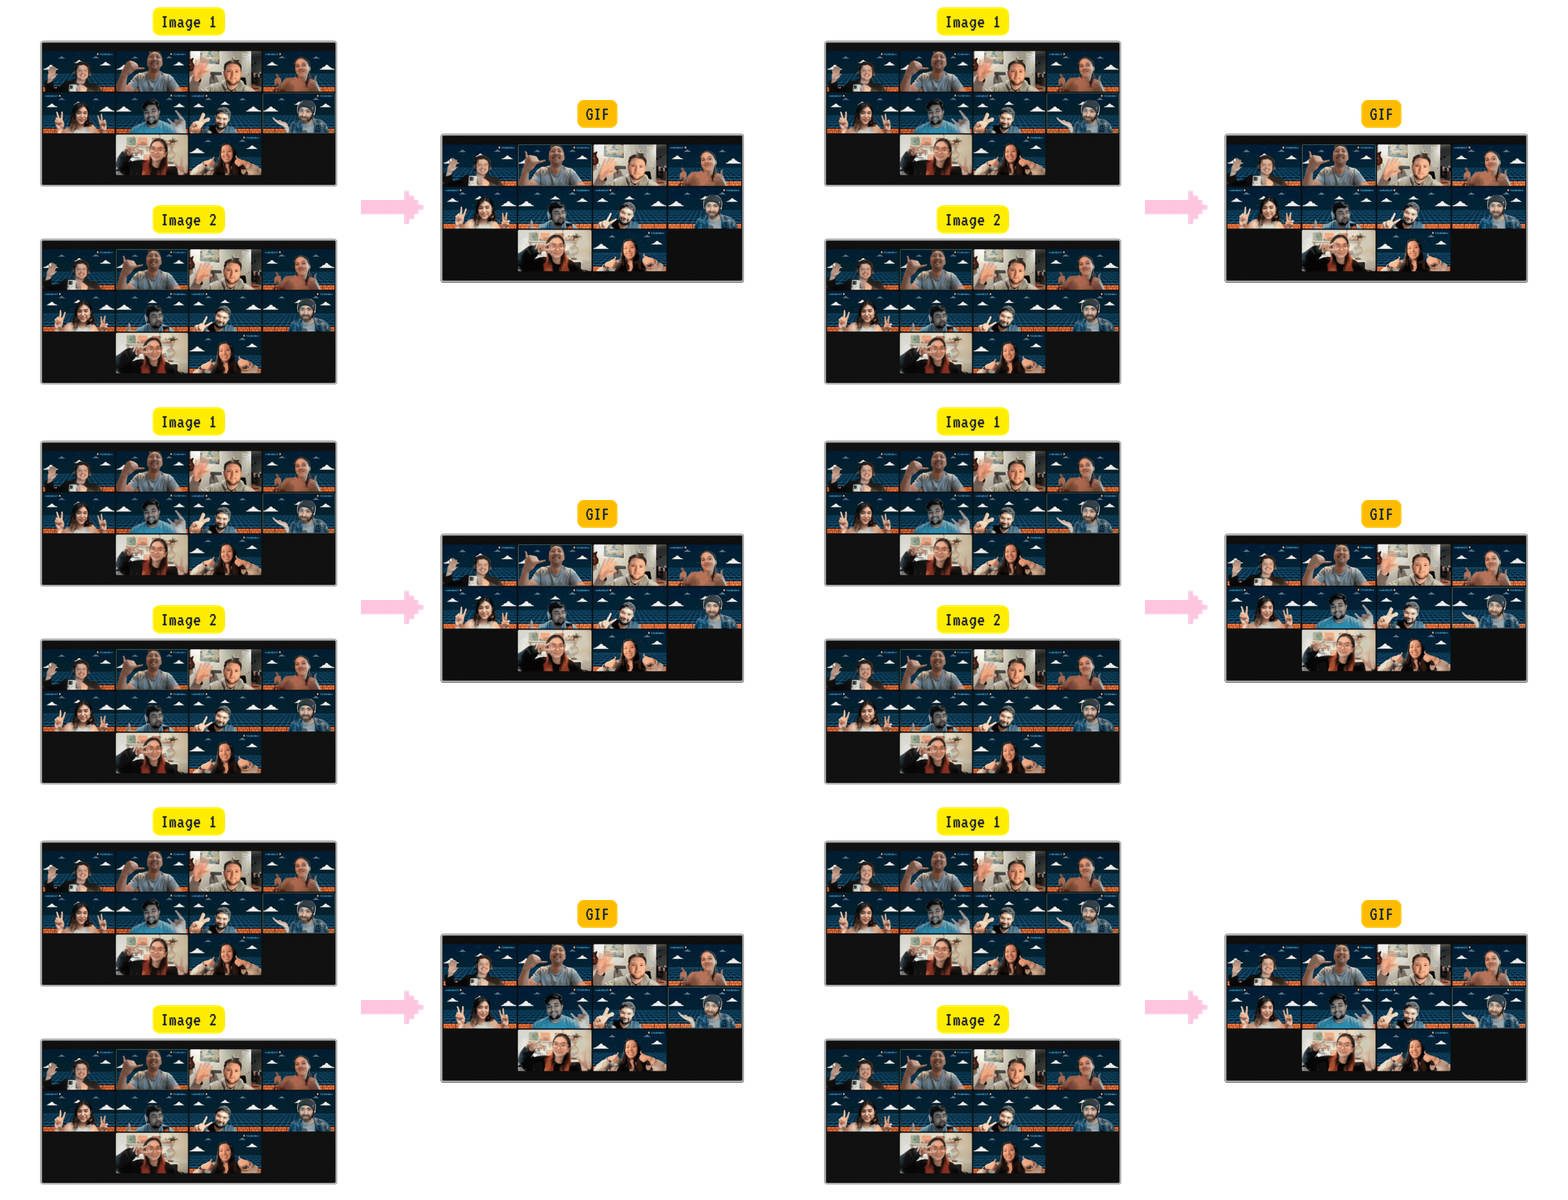
Here are two images that you can use for this project:
Note: Make sure to store the image files in the same folder as your Python program file. 💡
In our Python program, we'll create a list that contains the locations of the image files. We also need to create an empty list that will be used to store the actual image data from these files.
filenames = ['team-pic1.png', 'team-pic2.png']
images = [ ]
Next, let’s use a for loop to go through the file paths and read the images using imageio library’s .imread() method:
for filename in filenames:
  images.append(iio.imread(filename))
The .imread() method loads an image based on the file path. So now, our images variable has all the images!
Lastly, let’s use the .imwrite() method to turn the images into a GIF:
iio.imwrite('team.gif', images, duration = 500, loop = 0)
This takes in four arguments:
'team.gif': This is the name you want to give to your new GIF file.images: The list containing the image data.duration = 500: How long each picture should show in the GIF, in milliseconds.loop = 0: How many times the GIF should repeat (0 means it keeps looping forever).And that’s it! Here’s the whole program:
import imageio.v3 as iio

filenames = ['team-pic1.png', 'team-pic2.png']
images = [ ]

for filename in filenames:
  images.append(iio.imread(filename))

iio.imwrite('team.gif', images, duration = 500, loop = 0)
Let’s run this program and see what happens!
In the terminal, navigate to the folder with the Python file using cd (change directory as taught in the Command Line course. For example, if your file and images are in the Desktop folder, you can do:
cd Desktop
Run python3 and the file name:
python3 create_gif.py
If you are in VS Code, you can run the program by clicking the play button ▶️ (might need to also "Select Interpreter" to run the correct version of Python).
A new team.gif should appear in the same folder:

Challenge yourself to take things further!
First, use your own images this time. Find two images online or on your computer and store them in the same folder as the Python file. Update the file names in the code and run again!
Note: Make sure the images have the same width and height. 💡
As a bonus, try to create a GIF using three or more images instead of just two! Here's a collection of images to play with. Where do you think the code needs to change?
Congrats! You created a GIF in just 6 lines of code. Now you don’t have to rely on paid online tools to sew your images into GIFs. You just need a list, a for loop, and the imageio library to do the trick. ✨
Let me know what GIFs you have created by tagging @codedex_io on Twitter or IG!

Need Help?
